FTDX1200 Operating Manual Page 33

BASIC OPERATION: RECEIVING ON AMATEUR BANDS Cont'd

Previous Page    Index of Topics    Table of Contents    Index of Pages    Next Page

Here is the typical start-up procedure for normal operation:


1.    Turn on the external DC power supply.

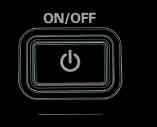
2.    Press and hold in the front-panel [ON/OFF]

switch until the transceiver turns on. After about five seconds (ten seconds if the optional µTuning Kit is connected), the transceiver is ready for full operation.

3.    The transceiver will start up on 7.000.000 MHz LSB, (or the previously used operating frequency) and normal operation may begin.

NOTE:
To turn power off, press and hold in the front-panel [ON/OFF] switch for one second.

4.    Rotate the [AF]

knob to set a omfortable audio level of the incoming signals or noise. Clockwise rotaion of the [AF] knob increases the volume level.

NOTE:
When using headphones, start by rotating the [AF] knob counter-clockwise, then bring the volume level up after you put the headphones on. This will minimize the chance of damage to your hearing caused by an unexpected high audio level.

5.    Press an appropriate [BAND] key corresponding to the Amateur band on which you wish to begin operation.

ADVICE:

One-touch selection of each Amateur band between 1.8 and 50 MHz is provided.

The FTDX1200 utilizes a triple band-stack VFO selection technique, which permits storing up to three favorite frequencies and modes onto each VFO band register. For example, you may store one frequency each on 14 MHz CW, RTTY, and USB, then recall these frequencies by successive, momentary


presses of the [14] MHz band button. Each Amateur band button may similarly have up to three frequency/mode settings applied.

When the [MHZ/µT] button (located to the left of the [VFO-B/CLAR] knob) is pressed, the "MHz" notation will appear in the display, and then rotation of the [VFO-B/CLAR] knob will change the frequency in 1 MHz steps.

6.    Press the [ANT] button to select the appropiate antenna for the band is use.

ADVICE:
When you make an antenna selection, that antenna is "remembered" by the microprocessor in conjunction with the VFO register in use.

7.    Press the [MODE] button to select the desired operating mode.

Repeated presses of the [MODE] button steps through the available selections.
Pressing and holding the [MODE] button will toggle to the alfternate mode.
For example, In the LSB or USB modes, pressing and holding the [MODE] button toggles between "LSB" and "USB" mode.

ADVICE:

By convention in the Amateur bands, LSB is used on the 7 MHz and the lower bands (with the exception of the 60 meters), while USB is utilized on the 14 MHz and higher bands.

When changing modes from SSB to CW, you will observe a frequency shift on the display. This shift represents the BFO offset between the "zero beat" frequency and the audible CW pitch (tone) you can hear (the pitch is programmed via the Menu item "066 CW FREQ display"), even

Cont'd Next Page "Basic Operation: Receiving on Amateur Bands"

Previous Page    Index of Topics    Table of Contents    Back to Top    Index of Pages    Next Page

FTDX1200 Operating Manual Page 33